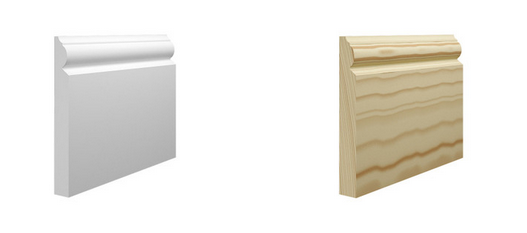
Skirting boards, also called baseboards, are not only a ornamental addition to your house in addition they offer a practical intent behind protecting the base of your surfaces from scuffs and harm. Setting up skirting boards may seem just like a skirting board overwhelming project, but with the right instruments and a little know-how, it can be a rewarding do-it-yourself task. With this phase-by-step guideline, we’ll take you step-by-step through the whole process of Build-it-yourself skirting installing for beginners.
**Step 1: Accumulate the desired Resources and Supplies**
Before starting, ensure you have the instruments and supplies necessary for the installation. You’ll require a measuring tape, a miter found or coping found, a hammer, fingernails or possibly a nail gun, a stage, timber putty, and sandpaper. In addition, obtain enough skirting boards to pay the duration of the walls you intend to put in them on, with some extra for spend.
**Step Two: Calculate and Lower the Skirting Boards**
By using a measuring tape, meticulously evaluate the length of every walls where you’ll install the skirting boards. Include a couple of centimeters to each and every measurement to account for any corners or unequal corners. Move these dimensions onto the skirting boards and symbol the slicing facial lines. Make use of a miter found or dealing saw to make precise 45-degree slashes at the sides. For inner corners, reduce the boards to suit snugly through a dealing saw to eliminate the back fringe of the skirting board.
**Step 3: Examination Suit the Skirting Boards**
As soon as you’ve cut the skirting boards, do a test in shape across the walls to make sure they fit properly. Make any needed alterations in the cuts to guarantee a effortless fit at the corners and along the size of the surfaces.
**Stage 4: Install the Skirting Boards**
Begin installation at a single part of your place. Apply a slender line of wooden putty on the rear of the skirting boards to help stick those to the wall structure. Meticulously press the skirting boards against the walls, making sure these are stage and straight. Utilize a hammer and fingernails or toenails or even a nail weapon to safe the panels set up. Nail them at an direction through the leading part of the skirting board, and so the nails are not visible on the outside.
**Stage 5: Load Holes and Fine sand the Skirting Boards**
When each of the skirting boards are installed, use wood putty to load any nail slots and gaps at the edges. Enable the putty to dried up based on the manufacturer’s recommendations. After, use sandpaper to easy out your putty and any rough sides in the skirting boards.
**Move 6: Painting or Blemish the Skirting Boards**
Finally, paint or blemish the skirting boards to fit your inside decoration. Use a number of jackets, enabling sufficient drying time in between each jacket.
Together with the skirting boards securely installed and coloured, step back, and admire your handiwork. Do-it-yourself skirting installation can be a fulfilling and cost-efficient way to improve the style and protection of the surfaces, incorporating a little style to your residence.