Prototyping is definitely an exciting element of product advancement, but it may also be puzzling and overwhelming, specifically newbies. A prototype is actually a real counsel of your concepts that you can use to test, assess, and polish your product or service just before continuing to move forward with prototype image manufacturing. Within this beginner’s guideline, we’ll take you step-by-step through the various steps of prototyping and give guidelines on how to manufacture a prototype that meets your requirements.
1. Making Design and style Specifications
Step one in producing a prototype is always to create design and style specs. These features work as a manual for your personal prototype producer and include information and facts such as materials, dimensions, and particular capabilities your prototype must have. Look at starting with a hard drawing or a laptop or computer-assisted style (CAD) to assist you much better envision your style. Be as detailed as is possible with the style features to make sure that your manufacturer can create a prototype that fits your requirements.
2. Selecting the best Developing Method
The next phase is to choose the manufacturing approach that works the best for your project. This selection is dependent upon various elements like the complexity of your own style, materials you’re utilizing, as well as your budget. Some well-known developing techniques include 3 dimensional stamping, injections molding, and CNC machining. Analysis each approach and speak with a skilled to assist you to make the best determination for your undertaking.
3. Selecting the most appropriate Components
The types of materials used in your prototype will significantly impact the finish product’s high quality and sturdiness. Select supplies that are readily available, simple to work with, and accurate with their counsel of the ultimate item. Your substance selections may depend on your financial allowance, marketplace demands, and manufacturing approach. Some typical resources utilized in prototyping involve plastic material, metal, hardwood, and rubber.
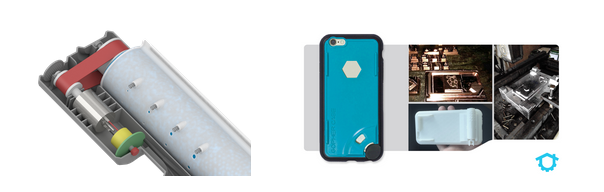
4. Screening and Refining
Once you have a prototype, it’s necessary to analyze it to ensure it fulfills your features and practical requirements. You can do this by performing a number of exams and evaluations in the prototype, which includes suit, functionality, and durability checks. In line with the tests results, you may have to refine your prototype, that can help improve its features and operation.
5. Reviewing and Modifying
The ultimate move would be to take a look at prototype and make necessary changes. Right after conducting several exams and evaluations, you should have a greater comprehension of your product’s strengths and weaknesses. Use this expertise to enhance your prototype before moving forward with generation. Think about acquiring opinions from prospective customers or perhaps a concentrate class to get diverse viewpoints on the way to make upgrades.
In a nutshell
Developing a prototype is surely an interesting and needed step in item development. It enables you to test, assess, and improve your thoughts before continuing to move forward with production. By simply following the techniques outlined in this particular beginner’s guideline, you may create a prototype that suits your requirements and practical specifications. Be sure you spend some time, pick the best manufacturing approach, and choose the correct materials. Test and improve your prototype depending on your results and modify accordingly. With determination and perseverance, you could make a prototype that not only suits you but is higher than your anticipations.